Getting Started
Welcome! Here are some quick guides.
⭐ Creating your API Key and Secret
An API key and secret are essential credentials that allow you to securely access and interact with the Securely.io API. Think of them as your personal password to unlock the power of Securely.io's payment processing features.
A Merchant account can create as many API Keys as required on the Merchant Portal.

Setup Keys in Merchant Portal
CautionWhile merchants can create multiple API keys, they should exercise caution and only create keys when necessary. Overusing keys can potentially increase the risk of security breaches.
🔑 Authenticating with an API Key
Every API call needs to include your API key and secret as headers. This allows Securely.io to verify your identity and ensure secure communication.
The API Key and secret must be separated by a semi-color, should be base64 encoded. The Authorization header format should be Authorization: Basic base64(ApplicationKey:ApplicationSecret).
curl -X POST \
  https://sandbox-api.securelyme.io/customers/import \
  -H "Authorization: Basic $(echo -n "$API_KEY:$API_SECRET" | base64)" \
  -H "Content-Type: application/json" \
  -d 'YOUR_JSON_DATA'
using System;
using System.Text;
using RestSharp;
var baseUrl = "https://sandbox-api.securelyme.io";
var apiKey = "YOUR API KEY";
var apiSecret = "YOUR API SECRET";
var encodedCredentials = Convert.ToBase64String(Encoding.ASCII.GetBytes($"{apiKey}:{apiSecret}"));
var jsonData = "{ \"name\": \"John Doe\", \"email\": \"[email protected]\" }";
var options = new RestClientOptions(baseUrl);
var client = new RestClient(options);
var request = new RestRequest("/customers/import", Method.Post);
request.AddHeader("Authorization", $"Basic {encodedCredentials}");
request.AddHeader("accept", "application/json");
request.AddStringBody(jsonData, DataFormat.Json);
RestResponse response = await client.ExecuteAsync(request);
Console.WriteLine(response.Content);const http = require('http');
const baseUrl = "https://sandbox-api.securelyme.io";
const path = "/customer/import";
const apiKey = "YOUR_API_KEY";
const apiSecret = "YOUR_API_SECRET";
const jsonData = JSON.stringify({ // Replace with your actual JSON data
name: "John Doe",
email: "[email protected]"
});
const encodedCredentials = Buffer.from(`${apiKey}:${apiSecret}`).toString('base64');
const options = {
hostname: new URL(baseUrl).hostname,
path: path,
method: 'POST',
headers: {
'Authorization': `Basic ${encodedCredentials}`,
'Content-Type': 'application/json'
}
};
const req = http.request(options, (res) => {
console.log(`statusCode: ${res.statusCode}`);
res.on('data', (d) => {
process.stdout.write(d);
});
req.on('error', (error) => {
console.error(error);
});
});
req.write(jsonData);
req.end();🪝Register a Webhook
Webhooks is a safe and trusted means of transmitting data from Securely.io. It is also the recommended approach.
You can define a webhook in the Securely.io Merchant portal (Settings >> Integrations >> Webhooks).
When a webhook is registered, Securely.io generates a message authentication code.
Every message sent by Securely.io will contain header x-securely-signaturewhich contains the hash of the message body with the message authentication code. It is recommended that merchants verify the signature by generating a hash using the message body and the message authentication code and very the signature in the header.
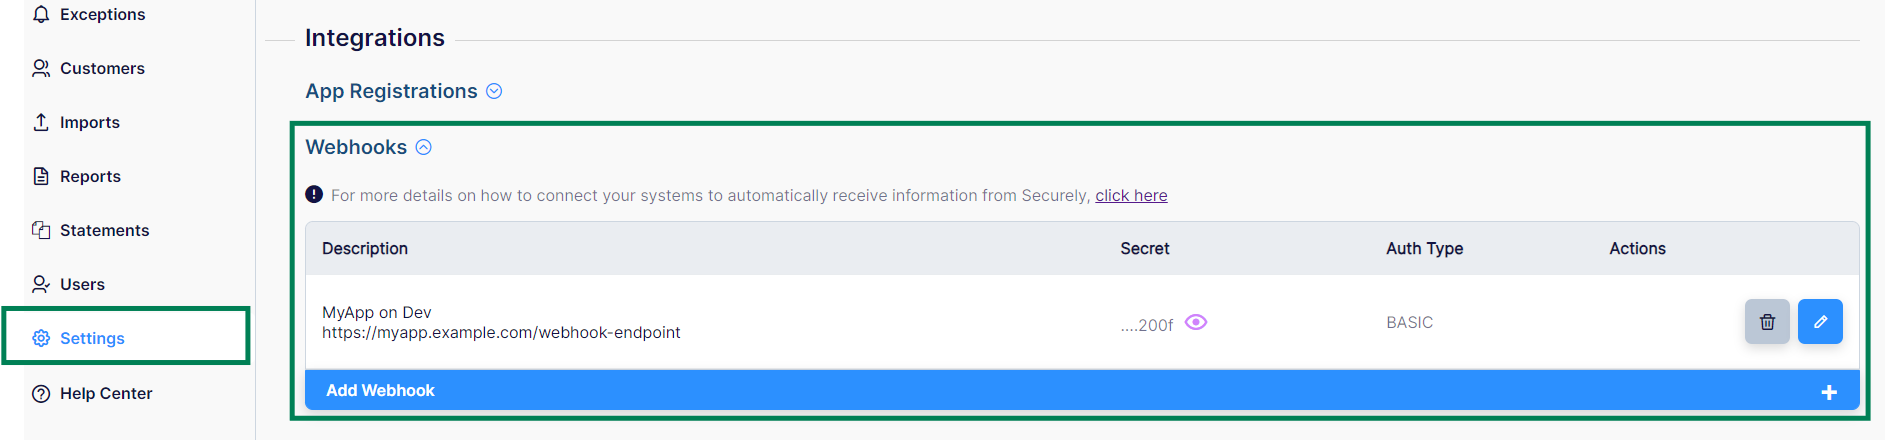
Webhook definition in the Merchant Portal
🏖️ The Sandbox
Securely.io uses an API sandbox to provides developers a safe and controlled space to experiment with and test an API without affecting the production environment. It allows developers to explore API functionality, understand how to make requests and interpret responses, and identify potential issues before deploying their applications.
Reach out to your Securely.io contact to get access to the sandbox.
https://sandbox.securelyme.io/
The Endpoint for API requests is: https://sandbox-api.securelyme.io
📫 API Responses Standards
Securely.io API responses follow a standardized JSON format to provide clear and consistent feedback. The response structure includes the following elements:
payload: An array containing the primary data returned by the API call. The specific structure of the objects within this array will vary depending on the endpoint and the requested data.correlationId: A unique identifier that can be used to correlate related API calls.success: A boolean indicating whether the API call was successful.error: An object containing error details, only present if the API call was unsuccessful. The error object includes:errorCode: A machine-readable error code.errorDisplayMessage: A human-readable error message.errorData: Additional data related to the error.isRetryable: A boolean indicating whether the operation can be retried.
Example Response:
{
    "payload": [
        {
            // Specific data for the API endpoint
        }
    ],
    "correlationId": string,
    "success": boolean,
    "error": {
      "errorCode": string,
      "errorDisplayMessage": string,
      "errorData": object,
      "isRetryable": boolean
    }
}
Updated 5 months ago